Start by carefully selecting a thrifted coffee table that fits your style, size needs, and space. Plan your makeover by choosing a color scheme, gathering supplies like primer, paint, and hardware, and preparing the surface. Decide on a design style—modern, rustic, or eclectic—and visualize how everything will come together. Follow a step-by-step process of sanding, painting, and decorating, then finish with touches that protect and showcase your masterpiece. Continue exploring to uncover all the tips and tricks for a stunning transformation.
Key Takeaways
- Select a thrifted coffee table that fits your style, size, and budget, ensuring it complements your space.
- Prepare the surface with sanding and proper primer to enhance paint adhesion and durability.
- Choose a cohesive color scheme and style—modern, rustic, or eclectic—to guide your makeover design.
- Apply paint, stain, or decorative finishes, and add hardware or accents for a polished, statement look.
- Finish with protective touches like sealants and proper maintenance to keep your transformed table looking great.
Selecting the Perfect Thrifted Coffee Table

Finding the right thrifted coffee table starts with knowing what style and size will complement your space. Consider furniture durability—pick a piece that can withstand daily use, especially if you have kids or pets. Look for sturdy materials like solid wood or metal, which tend to last longer. Budget considerations are also vital; set a clear price range beforehand to avoid overspending. Don’t rush; examine multiple options to find a table that fits your aesthetic and functional needs. Measure your space to guarantee the table won’t overwhelm the room or look too small. Additionally, assessing family photoshoot fails can help you choose a piece that adds a fun and personalized touch to your decor. By balancing style, size, durability, and budget, you’ll find a thrifted coffee table that’s a perfect foundation for your makeover project.
Preparing and Planning Your Makeover

Before you start transforming your thrifted coffee table, it’s vital to plan carefully to guarantee a successful makeover. Begin by determining your desired color schemes, which will guide your choice of paints, stains, or finishes. Think about how the table will complement your existing decor and choose a palette that fits your style. Next, set a realistic budget planning to avoid overspending. List all necessary supplies, from primer and paint to brushes or stencils, and allocate funds accordingly. Planning ahead helps you stay organized and ensures you won’t have to cut corners later. Take measurements of your space and the table to visualize the final result. Incorporating proper surface preparation into your plan is crucial, as it ensures the paint or finish adheres well and lasts longer. With a clear plan, your DIY project will be more efficient and enjoyable.
Choosing Your Style and Design Elements

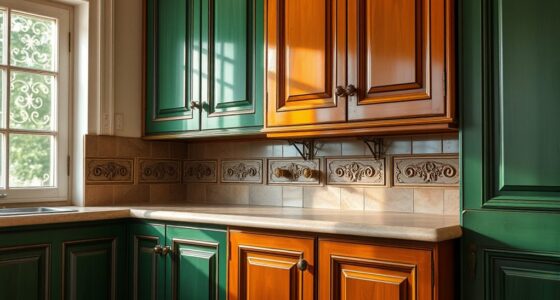
Choosing your style and design elements is the exciting part that brings your vision to life. This step helps you define the overall look and feel of your revamped coffee table. Consider your preferred color schemes—bold and vibrant, soft and neutral, or maybe a mix of both. Think about decorative accents like metal handles, inlays, or textured finishes that add personality. You might opt for a modern minimalist vibe with sleek lines and monochrome tones or a rustic farmhouse feel with distressed paint and natural wood. Visualize how these elements work together to create a cohesive piece. Focus on what reflects your style and complements your space, turning your thrifted find into a statement piece that truly stands out. Paying attention to color accuracy can help you choose finishes and accents that enhance the overall aesthetic.
Step-by-Step Transformation Process

Begin by gathering all the necessary tools and materials based on your chosen design. This includes paint, brushes, upholstery options, hardware choices, and protective finishes. To guarantee a smooth process, consider the following:
| Step | Action | Purpose |
|---|---|---|
| 1 | Sand the surface | Prepare for painting or staining |
| 2 | Paint or stain | Achieve your desired color and finish |
| 3 | Attach upholstery and hardware | Enhance style and functionality |
Choosing the right upholstery options can add comfort and personality, while hardware choices like knobs or handles refine the look. Carefully select and install these elements to match your design vision. Incorporating design principles can further elevate your project and ensure a cohesive aesthetic. This organized approach helps transform your thrifted find into a statement piece, ready for everyday use.
Finishing Touches and Maintenance Tips

Once you’ve completed your coffee table makeover, adding finishing touches can really elevate its look and guarantee durability. To keep it looking fresh, regularly check for scratches or chips and touch up the paint or finish as needed. Proper furniture arrangement around your table can enhance its statement piece status and improve shelf organization for magazines, remotes, or decor. Consider adding coasters or placemats to protect the surface from spills and heat. Keep the surface clean with a soft cloth and avoid harsh chemicals. For shelf organization, use baskets or decorative trays to tidy items and highlight your style. Regular maintenance will prolong its life and ensure your transformed coffee table remains a stylish, functional centerpiece in your space. Additionally, using protective accessories like pads or covers can help prevent damage from everyday use.
Frequently Asked Questions
How Can I Identify a Sturdy Thrifted Coffee Table?
To identify a sturdy thrifted coffee table, start by inspecting the construction for solid joints and avoid wobbly legs. Check the wood grain patterns to ascertain consistency and strength, especially if it’s made of wood. For upholstered parts, use upholstery tips to see if the fabric is tightly attached and in good condition. A sturdy table feels solid when you tap it, and its weight indicates durability.
What Budget-Friendly Materials Are Best for DIY Makeover?
Think of your project as a garden needing the right seeds. For a budget-friendly makeover, you can’t go wrong with budget-friendly paints that transform surfaces with a splash of color. Pair these with affordable hardware to add charm without breaking the bank. These materials are easy to find at craft stores or online, making your DIY process cost-effective and fun. With creativity and smart choices, you’ll turn your thrifted table into a stunning centerpiece.
How Do I Prevent Paint Chipping Over Time?
To prevent paint chipping and improve finish durability, you should apply a good paint protection like a clear topcoat or sealant. Make sure to prepare the surface properly by cleaning and sanding before painting. Use high-quality paint suited for your material, and allow ample drying time between coats. Regularly clean your table gently to avoid scratches that can lead to chipping, ensuring your makeover stays looking fresh longer.
Can I Customize the Table for Outdoor Use?
You can definitely customize your table for outdoor use by choosing weatherproof sealant and outdoor paint options. First, apply a high-quality outdoor paint designed to withstand the elements. Once dry, coat it with a weatherproof sealant to protect against moisture, UV rays, and temperature changes. This combo ensures your table stays vibrant and sturdy, making it perfect for outdoor spaces. Regular touch-ups with sealant will keep it looking fresh over time.
What Tools Are Essential for a Professional-Looking Finish?
Imagine a painter’s brush dancing across a canvas—your tools can do the same for your table. To achieve a professional-looking finish, you need essential tools like brushes, sandpaper, painter’s tape, and a high-quality paint sprayer. These allow you to master paint techniques and apply finishing touches smoothly. Proper prep, steady hands, and the right tools turn your project into a stunning statement piece with flawless detail.
Conclusion
With your thrifted coffee table now transformed, it’s like giving a hidden gem a new lease on life. Remember to enjoy the creative process and trust your style choices. Maintaining your new statement piece is simple—just a little routine care keeps it looking fresh and fabulous. Your DIY makeover proves that with a little effort, any find can become a stunning centerpiece, shining bright like a star in your living space.