
Ceiling treatments are becoming a popular DIY focus because they let you instantly transform a room without much expense or effort. By adding paint patterns, textured finishes, or lighting features, you can create a unique focal point that reflects your style. These projects are accessible with basic tools and allow you to personalize your space easily. Keep exploring to discover how simple upgrades can elevate your entire room’s look and mood.
Key Takeaways
- DIY ceiling treatments allow personalized design without high costs, making spaces more unique and stylish.
- Creative techniques like textured finishes and stenciling enable homeowners to enhance ceilings easily.
- Proper lighting integration transforms ceilings into focal points, elevating overall room ambiance.
- Overlooked ceilings offer a fresh canvas for impactful design, encouraging DIY experimentation.
- Enhancing ceilings with DIY methods increases visual interest and adds value to home interiors.

Have you ever considered how much a ceiling can influence the overall look of a room? It’s often overlooked, but it plays a crucial role in setting the mood and style of your space. More homeowners are recognizing the potential of ceiling treatments, transforming what used to be a plain, overlooked surface into a focal point of design. Whether you’re aiming for a subtle upgrade or a bold statement, you can easily make a ceiling stand out with some creative DIY techniques.
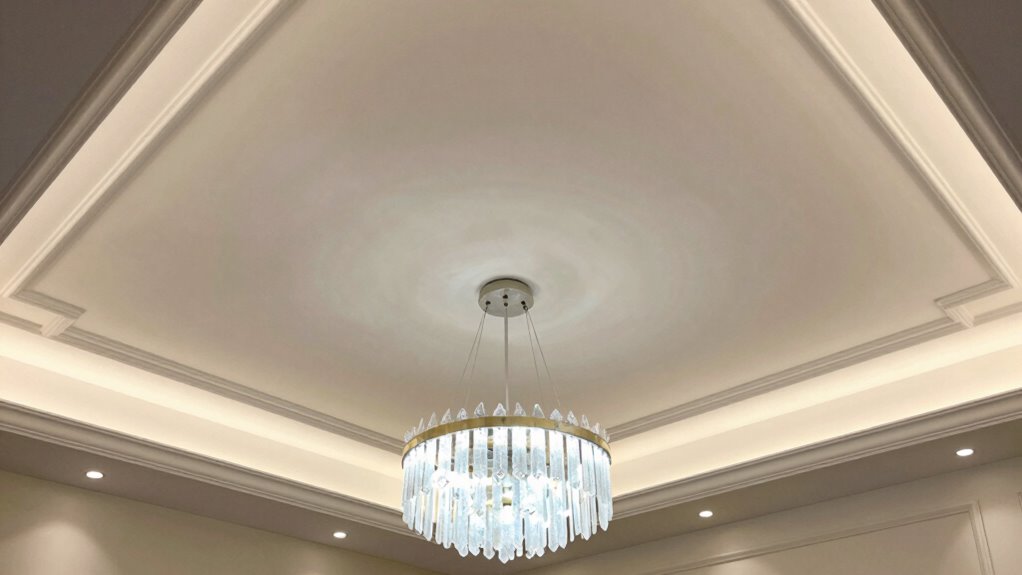
One of the most impactful ways to elevate your ceiling is by exploring lighting enhancements. Proper lighting can dramatically change how a ceiling appears, adding depth and warmth or creating a dramatic effect. Recessed lighting, pendant fixtures, or even strip LEDs can highlight architectural details or simply brighten the room. When you integrate lighting thoughtfully, you draw attention upward, making the ceiling a key feature rather than just a backdrop. It’s a simple yet effective way to add character and ambiance while also increasing the room’s functionality.
Lighting transforms ceilings into captivating focal points, adding depth, warmth, and ambiance effortlessly.
Decorative paint techniques are another powerful tool in your DIY arsenal for transforming ceilings. Instead of sticking with flat, one-color paint, you can incorporate textured finishes, stenciled patterns, or even faux finishes that mimic materials like wood or stone. These techniques bring visual interest and sophistication without the need for expensive renovations. For example, a subtle sponge or rag rolling technique can add a soft, textured look that enhances the room’s style while hiding imperfections. If you’re feeling more adventurous, stencil patterns or mural-like designs can turn your ceiling into a piece of art that complements your decor. Additionally, understanding the different types of ceiling treatments can help you choose the most suitable approach for your space and skill level. Exploring DIY techniques for ceiling enhancements can empower you to customize your space without professional assistance, allowing for more creative freedom. Recognizing the importance of visual impact can inspire you to experiment with different design elements and truly make your ceiling a standout feature.
The beauty of choosing ceiling treatments as a DIY project is that it allows you to customize your space without relying on professional help. With some basic tools, paint, and patience, you can experiment with different decorative paint techniques and lighting setups to find what works best for your aesthetic. Plus, tackling these projects yourself gives you the chance to incorporate your personal touch, ensuring the end result truly reflects your style. Incorporating proper planning ensures that your design choices align with the overall room layout and purpose, making your project more cohesive and effective.
Additionally, understanding projector installations and cabling solutions can help you plan your space more efficiently when integrating lighting and decor elements, ensuring a seamless and professional look. In the end, rethinking your ceiling as a design element opens up a world of possibilities. It’s a cost-effective way to refresh your room’s look and add a layer of visual interest that guests will notice. By focusing on lighting enhancements and decorative paint techniques, you can create a stunning ceiling that elevates the entire space effortlessly. It’s an achievable project that transforms a usually overlooked surface into a conversation-starting feature of your home.

Amico 12 Pack 6 Inch 5CCT Ultra-Thin LED Recessed Ceiling Light with Junction Box, 1050LM Brightness, Dimmable Canless Wafer Downlight, 12W, ETL&FCC
5 CCT-in-1: 5 color temperature(2700K, 3000K, 3500K, 4000K, 5000K) is selectable to you, which successfully eliminates the hassle…
As an affiliate, we earn on qualifying purchases.
As an affiliate, we earn on qualifying purchases.
Frequently Asked Questions
What Tools Are Essential for DIY Ceiling Treatments?
You’ll need essential tools like a measuring tape, level, and pencil for precise placement of decorative trims and to guarantee your design stays straight. A utility knife and scissors help cut trims and texture materials accurately. For applying texture techniques, use a brush or roller. A caulking gun is useful for sealing edges, and a ladder provides safe access to high ceilings. These tools make your ceiling treatment project smoother and more professional-looking.
How Do I Choose the Right Ceiling Treatment for My Space?
You should choose a ceiling treatment that complements your space’s style and enhances its texture. Consider adding decorative accents like molding or unique patterns to create visual interest. If your ceiling has existing ceiling texture, select a treatment that either highlights or contrasts with it for balance. Think about how the treatment will work with your room’s overall design, lighting, and your personal style to make the best choice.
Are DIY Ceiling Treatments Cost-Effective Compared to Hiring Professionals?
Sure, DIY ceiling treatments might seem like a money-saving miracle, but beware—cost savings can quickly vanish if you need multiple repairs or corrections. While you develop new skills and enjoy the satisfaction of a custom look, hiring professionals often guarantees a polished finish without the trial-and-error. In the end, your DIY project could cost less, but only if you’re willing to invest time, patience, and a bit of humility.
How Long Does a Typical DIY Ceiling Project Take?
A typical DIY ceiling project takes about one to three days, depending on the complexity of your ceiling design and decorative finishes. If you’re applying paint, wallpaper, or simple moldings, it might only take a day. For more intricate designs like coffers or textured finishes, plan for several days. Proper preparation and patience guarantee your ceiling looks professional and enhances your space’s overall aesthetic.
Can Ceiling Treatments Improve Room Acoustics?
Ceiling treatments are like a sponge for sound, soaking up noise and enhancing your room’s acoustics. They can profoundly improve sound absorption, making conversations clearer and reducing echo. By adding textured panels, acoustic tiles, or fabric-covered treatments, you actively boost acoustic enhancement. This creates a more comfortable, inviting space where sound feels just right, proving that your ceiling isn’t just a visual feature but an essential part of your room’s sonic environment.
Homax 41072041218 Texture Touch Up Kit, Wall and Ceiling Texture and Sprayer
Hand-operated texture repair tool use to repair walls and ceilings
As an affiliate, we earn on qualifying purchases.
As an affiliate, we earn on qualifying purchases.
Conclusion
Ceiling treatments are transforming your space, inspiring you to elevate your design game. They add character, create ambiance, and showcase your creativity—all without a professional’s touch. Whether you choose bold paint, textured panels, or decorative molding, you’re crafting a statement that reflects your style. So, embrace the challenge, enjoy the process, and turn your ceiling into a mesmerizing focal point. Because when you focus on the top, you truly elevate your entire home.

Decorations for Walls and Panels: Early Twentieth-Century Design and Pattern
As an affiliate, we earn on qualifying purchases.
As an affiliate, we earn on qualifying purchases.

Ekena Millwork CC08ICN02X14X14TR Inner Corner for 8" Traditional Coffered Ceiling System, 14"W x 2"P x 14"L, Primed
Modeled after original historical patterns and designs
As an affiliate, we earn on qualifying purchases.
As an affiliate, we earn on qualifying purchases.