
To strip paint and re-stain your wood furniture, start by applying a chemical paint stripper with a brush, following the manufacturer’s instructions, and wait until the paint softens. Gently scrape off the loosened paint, then sand the surface smooth with fine-grit sandpaper. Once clean, apply a wood conditioner to guarantee even staining, then use your chosen stain with a cloth or brush, wiping off excess. Finish with a protective sealant for a beautiful, renewed piece—more tips await if you continue.
Key Takeaways
- Use chemical paint strippers to soften old paint, following manufacturer instructions and ensuring proper ventilation.
- Gently sand the surface with fine-grit sandpaper after stripping to smooth and prepare for staining.
- Apply a wood conditioner before staining to achieve an even, natural finish and prevent blotchiness.
- Use a brush or cloth to apply stain along the grain, wiping off excess for a uniform look.
- Seal the stained furniture with a protective finish like polyurethane for durability and enhanced color preservation.

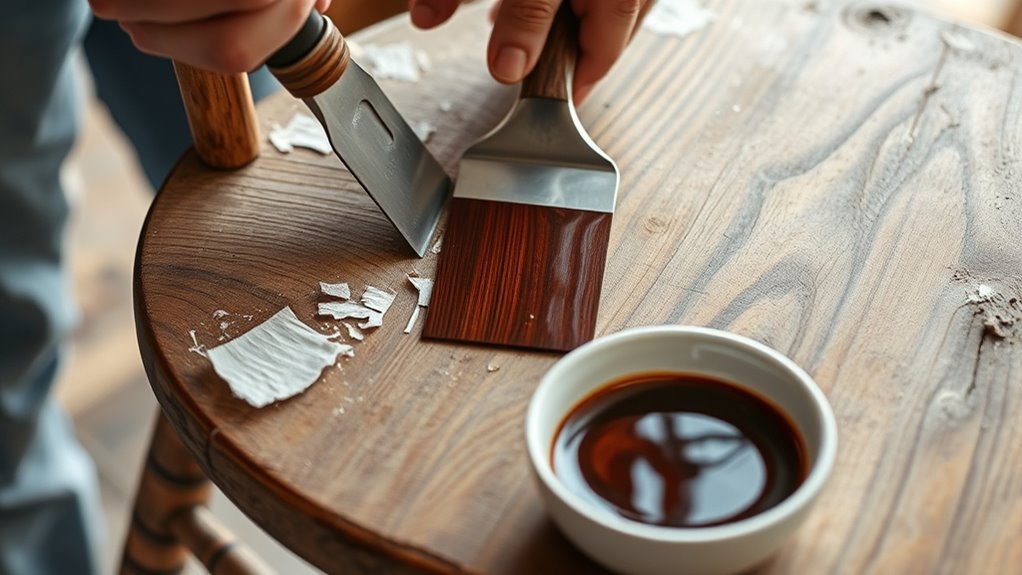
If you’re looking to give your wood furniture a fresh new look, stripping off old paint and re-staining is a rewarding project you can tackle yourself. The first step is paint removal, which requires patience and the right tools. You can choose between chemical paint strippers or mechanical methods such as sanding. Chemical paint strippers are effective at softening paint, but they emit fumes, so work in a well-ventilated area and wear protective gloves and goggles. Apply the stripper with a brush, following the manufacturer’s instructions, and let it sit until the paint loosens. Then, use a scraper or putty knife to gently lift off the paint, taking care not to gouge the wood. For smaller or intricate areas, a fine-grit sanding block helps remove stubborn paint residues. Mechanical removal through sanding involves using a handheld or power sander with medium-grit sandpaper to strip away layers of paint. This method produces dust, so guarantee proper ventilation and wear a dust mask. Once you’ve thoroughly removed the paint, you’ll want to refine the surface by sanding with finer grit sandpaper, smoothing out any rough patches and preparing the wood for staining. This step is vital because a smooth, clean surface assures that your staining techniques will produce an even, professional-looking finish.
Additionally, understanding the importance of proper surface preparation can significantly impact the durability and appearance of your finished project. After the old paint is gone and the surface is prepped, you’ll need to decide on your staining approach. Staining techniques vary depending on the look you want and the type of wood you’re working with. If you prefer a natural look, use a wood conditioner before staining to prevent blotchiness. Apply your stain with a cloth or brush, working along the grain, and wipe off excess to control the depth of color. For richer, more vibrant tones, apply additional coats once the first layer dries thoroughly. Remember, different woods absorb stain differently, so test it on a hidden area first. If you want a more opaque finish, consider using a gel stain, which offers more control and less mess. Once you’re satisfied with the color, seal your work with a clear protective finish like polyurethane or a varnish to preserve the stain and add durability.
Throughout this process, patience is key. Proper paint removal and careful staining techniques will give your furniture a stunning new appearance. Take your time, follow safety guidelines, and enjoy the transformation. With effort and attention to detail, you’ll create a piece that looks refreshed and beautifully restored.
Frequently Asked Questions
How Long Does the Entire Stripping and Re-Staining Process Take?
The entire process varies depending on your project, but generally, stripping time can take a few hours to a day, and drying duration might add another one or two days. You’ll need to remove old paint or stain thoroughly, then wait for the surface to dry completely before applying new stain. Planning for a couple of days guarantees you have enough time for each step, resulting in a smooth, professional finish.
Are There Eco-Friendly Paint Stripping Options Available?
You’re wondering if eco-friendly paint stripping options exist. Yes, there are biodegradable solvents and natural paint removers available that are safer for the environment. These eco-friendly products effectively remove paint without harsh chemicals, making your project less toxic and more sustainable. By choosing natural paint removers, you protect your health and the planet while achieving great results. Always follow the instructions for best results and safety precautions.
Can I Strip Paint and Re-Stain Furniture Outdoors Safely?
Imagine you’re a pioneer on a frontier, tackling outdoor projects. You can strip paint and re-stain furniture outdoors safely by choosing eco-friendly options and ensuring proper ventilation. Use biodegradable paint strippers and wear protective gear. Work in a well-ventilated area, avoid open flames, and follow manufacturer instructions. Prioritizing outdoor safety means protecting yourself and the environment, making your project both successful and eco-conscious.
What Safety Gear Should I Wear During Stripping and Staining?
When you’re working on stripping and staining, safety gear is vital. You should wear protective clothing to shield your skin from chemicals and potential splashes. Respiratory protection, like a mask or respirator, is essential to avoid inhaling fumes and dust. Always make sure your gear fits properly and is rated for chemical exposure. Taking these precautions helps keep you safe while you transform your furniture.
How Do I Prevent Streaks or Uneven Color During Re-Staining?
Imagine your wood as a blank canvas waiting for a smooth, even splash of color. To prevent streaks or uneven color, focus on an even stain application using a consistent brush technique. Work in manageable sections, overlap your strokes slightly, and maintain a steady hand. This approach guarantees the stain settles evenly, avoiding blotches or streaks. Patience and careful, deliberate strokes turn your project into a masterpiece of flawless, uniform color.
Conclusion
So, there you have it—your thrilling journey from chipped nightmare to glossy dream. Who knew stripping paint and re-staining could be so exhilarating? Just think: with a little elbow grease and some patience, you’ve transformed tired furniture into a masterpiece. Now, sit back and admire your handiwork, because nothing says “I’ve got too much free time” like reviving old wood. Cheers to turning trash into treasure—who knew DIY could be so addictive?