Start by removing all hardware and cleaning your cabinets thoroughly. Lightly sand surfaces for smoothness and wipe away dust. Apply a high-quality primer if needed, especially when switching from dark to light colors. Use a brush for detailed areas and a roller for large surfaces, applying thin coats of high-quality semi-gloss or satin paint. Allow each coat to dry completely before adding the next. For professional results, follow proper prep and application techniques, and you’ll discover all the essential steps ahead.
Key Takeaways
- Remove hardware, clean, and lightly sand cabinets to ensure smooth, paint-adherent surfaces.
- Apply a high-quality primer, especially when changing from dark to light colors or using gloss finishes.
- Use high-quality semi-gloss or satin paint, applying thin, even coats with a brush and roller.
- Allow each coat to dry thoroughly and cure fully before reassembling or reattaching hardware.
- Select hardware and colors that complement your style for a cohesive, professional-looking finish.

Thinking about giving your kitchen a fresh look? One of the most effective ways to do that is by painting your cabinets. Before diving in, it’s essential to consider your color selection. The right color can dramatically change the room’s vibe, making it feel brighter, cozier, or more modern. Think about the overall style you want to achieve and how the new shade will complement your countertops, backsplash, and flooring. If you’re aiming for a timeless look, neutral tones like whites, grays, or beiges work well. For a bold statement, consider deep blues, emerald greens, or even black. Keep in mind that lighter colors tend to make a space feel larger and more open, while darker shades add drama and sophistication. Once you’ve settled on a color, it’s also a good idea to think about hardware updates at this stage. Swapping out old handles and knobs for new ones can instantly refresh the cabinets’ appearance and tie your new color scheme together. Modern hardware in brushed nickel, matte black, or brass adds a contemporary touch, while vintage-inspired pieces can give your kitchen a nostalgic charm. Choosing hardware that complements your cabinet color and overall kitchen style will elevate the final look.
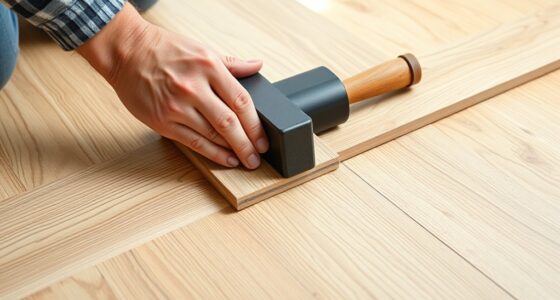
When you’re ready to start painting, prepping your cabinets properly is key. Remove all hardware and clean the surfaces thoroughly to eliminate grease and grime. Lightly sand the cabinets to create a smooth surface that will help the paint adhere better. Wipe away any dust with a damp cloth and let everything dry completely. Applying a high-quality primer is vital, especially if you’re changing from a dark to a light color or working with a glossy finish. The primer ensures even coverage and prevents the paint from peeling over time. Once the primer is dry, use a high-quality paint suitable for cabinets—preferably a semi-gloss or satin finish that’s durable and easy to clean. Use a brush for detailed areas and a roller for larger surfaces, applying thin, even coats. Let each coat dry thoroughly before adding the next to avoid drips and uneven coverage. After the final coat, allow the paint to cure fully before reattaching hardware and hanging cabinet doors back in place. Additionally, understanding paint adhesion techniques can help improve the durability of your finish and ensure a professional-looking result.
Updating your kitchen cabinets through painting is a rewarding project that can dramatically transform your space. With careful color selection, thoughtful hardware updates, and proper preparation and application, you’ll enjoy a fresh, customized look that enhances your entire kitchen.

TEENFON Storage Cabinet with Doors & 2 Drawers, Kitchen Cabinet with Adjustable Shelf, Pantry Cabinets, Bathroom Cabinets, for Living Room, Entryway, Home Office, White
⭐【Clutter-to-Calm in Seconds】With 2 spacious drawers to stash away odds and ends, wide tabletop and 2 open shelves...
As an affiliate, we earn on qualifying purchases.
Frequently Asked Questions
How Do I Choose the Right Paint Finish for Kitchen Cabinets?
When choosing the right paint finish for your kitchen cabinets, consider your paint color options and how they complement your space. For durability, opt for a semi-gloss or satin finish, which withstands moisture and frequent cleaning. Think about cabinet restoration techniques that enhance the finish’s longevity. Your choice depends on your style preferences and functional needs, ensuring your cabinets look great and last for years.
Can I Paint Over Existing Stained or Laminated Cabinets?
Did you know that over 60% of homeowners repaint cabinets to update their kitchens? You can definitely paint over stained or laminated cabinets if you do proper cabinet prep. First, clean and sand the surface to make sure of good adhesion. Then, choose the right paint types, like primer and durable enamel, for a smooth, lasting finish. This approach helps you achieve a fresh look without stripping or replacing your existing cabinets.
What Tools Are Essential for a Professional-Looking Finish?
To achieve a professional-looking finish, you need the right tools. Start with a good brush selection tailored to your paint type, ensuring smooth, even coverage. Use quality sanding supplies to prep the surface properly, removing old paint or stains for better adhesion. Don’t forget a primer and painter’s tape for clean edges. These tools help you get a polished, durable result that looks expertly done.
How Long Does Painted Cabinet Paint Typically Last?
You might wonder how long painted cabinet paint lasts. Generally, good quality paint offers excellent durability, with a typical cabinet paint lifespan of 5 to 10 years. Factors like surface prep, paint type, and daily use influence paint durability. To maximize longevity, opt for high-quality paint, apply proper prep, and consider a protective topcoat. Proper maintenance guarantees your cabinets stay fresh and vibrant for years to come.
Is It Necessary to Remove All Cabinet Hardware Before Painting?
Imagine your cabinets are a beautiful painting; removing the cabinet hardware is like taking down ornate frames to reveal the artwork. You don’t have to remove all hardware, but doing so makes the removal process easier and cleaner. It prevents paint from getting on your hardware and allows for a smoother finish. So, for a flawless look, it’s best to take off cabinet hardware before painting.

HOSTACK 71" Large Pantry Cabinet with Charging Station, 55" Wide Kitchen Pantry Storage with Drawers and Power Outlet, Tall Kitchen Hutch with Countertop for Kitchen, White
End Storage Woes: Featuring 6 generous cabinets with adjustable shelves for kitchen overflows, 3 deep drawers to organize...
As an affiliate, we earn on qualifying purchases.
Conclusion
Now that you’ve mastered the steps to paint your kitchen cabinets, imagine the stunning transformation awaiting your space. But wait—there’s one more essential detail you can’t afford to overlook if you want a flawless finish. Are you ready to discover the secret that guarantees your DIY project will look professional? Keep reading, because the final touch could make all the difference—and it’s just around the corner. Your dream kitchen is closer than you think.

Rust-Oleum 372007 Transformations Basics Cabinet & Trim Paint, Quart, Pure White, 32 Fl Oz (Pack of 1)
Ideal for transforming old, outdated cabinets in kitchens, bathrooms, offices and more
As an affiliate, we earn on qualifying purchases.

Beyond Paint All-in-One Refinishing Paint, No Sanding, Matte Finish for Cabinets, Countertops, Furniture and Doors, 1 Quart, Navy
All-surface uniquely formulated paint solution: Easily refinish furniture, cabinets, countertops, doors, trim, floors and more
As an affiliate, we earn on qualifying purchases.