
Color drenching involves painting your walls, trim, and ceiling in a single, unified hue to create a seamless, immersive look. This technique enhances your space’s flow, making it feel larger and more harmonious by reducing color shifts. It simplifies the painting process and delivers a calming, cohesive aesthetic. Choosing the right shade and applying it carefully will transform your room into a polished, sophisticated environment. Keep exploring to discover how to perfect this bold design choice.
Key Takeaways
- Color drenching involves painting walls, trim, and ceiling in a single hue for a seamless, immersive environment.
- Choose harmonious shades with tonal variation and subtle sheen differences to add depth and interest.
- Use high-quality primer and apply multiple thin coats for a smooth, flawless finish.
- Ideal for high ceilings and open spaces to enhance flow and create a larger, cohesive look.
- Testing colors in different lighting ensures the shade maintains its desired visual effect throughout the space.

Have you ever wondered how to give your walls a stunning, cohesive look? Color drenching is an innovative approach that involves painting your walls, trim, and ceiling all in one shade, creating a seamless, immersive environment. This technique isn’t just about picking a color; it’s about understanding color harmony to make your space feel balanced and intentional. When you choose a single hue for all surfaces, you establish a unified backdrop that brings harmony to the room, making it feel larger, more connected, and visually calming. To do this effectively, you need to master certain paint techniques that guarantee a smooth, even finish across all surfaces, preventing any harsh lines or mismatched edges.
Color drenching creates a seamless, immersive room by painting walls, trim, and ceiling in one harmonious shade.
Start by selecting a shade that resonates with your mood and complements your existing furniture or decor. The key is to find a color that offers enough variation in tone to add depth without overwhelming the space. Once you’ve picked your hue, consider the paint techniques involved in executing the drenching process. Use high-quality primer to create a uniform base, which helps the color appear vibrant and true. When applying paint, employ techniques like cutting in carefully along corners and edges, then rolling in overlapping strokes to prevent streaks or uneven patches. Applying multiple thin coats rather than one thick layer guarantees a richer, more consistent color saturation. The goal is to achieve a flawless, all-over finish that makes every surface look like part of a single, cohesive canvas.
Color drenching works best in spaces with high ceilings or open floor plans, where the uniform color enhances the sense of flow and connection. If you’re worried about the room feeling monotonous, incorporate subtle variations in sheen—matte for the walls, semi-gloss for trim, and perhaps a satin ceiling—to add visual interest without breaking the color harmony. This approach simplifies the painting process because it reduces the need for multiple colors and complicated transitions, streamlining your project while still creating a bold, immersive aesthetic. Remember that lighting plays a critical role; natural light will reflect differently on your chosen color, so it’s wise to test a sample in various lighting conditions before committing.
Additionally, understanding color harmony can help you select shades that work beautifully together, ensuring your drenching results are both harmonious and striking. In essence, color drenching is a daring yet sophisticated way to unify your space. By carefully selecting a harmonious shade and employing precise paint techniques, you’ll transform your room into a seamless, visually stunning environment that feels both intentional and soothing. This method doesn’t just paint walls; it creates an atmosphere where every surface speaks the same language, making your space feel larger, more polished, and effortlessly stylish.

Scotch Felt Pads 162 PCS Beige, Felt Furniture Pads for Protecting Hardwood Floors, Round, Assorted Sizes Value Pack, Self-Stick design, Protecting from nicks, dents and scratches (SP845-NA)
- Suitable for Various Furniture: Protects chair legs, tables, and decor
- Easy to Install: Peel and stick for quick setup
- Protects Hard Surfaces: Safeguards hardwood, tile, laminate, vinyl
As an affiliate, we earn on qualifying purchases.
Frequently Asked Questions
How Do I Prevent Color Bleeding Between Surfaces?
To prevent color bleeding, you should start by applying edge protection along your surfaces to keep paint from spreading. Use a high-quality paint primer on all surfaces to create a uniform base, which helps block bleeding through. When painting, work in thin, even coats, and allow each layer to dry thoroughly before applying the next. This approach minimizes color bleed and guarantees a clean, seamless finish.
What Types of Paint Are Best for Color Drenching?
You should choose high-quality, matte or eggshell paint for color drenching, as they help maintain color consistency across all surfaces. These paint finishes absorb light evenly, reducing sheen differences. Look for paints specifically designed for interior walls, trims, and ceilings that offer excellent coverage and durability. Using a paint with good pigmentation guarantees your chosen shade stays vibrant and uniform, giving your space a seamless, cohesive look.
How Long Should I Wait Between Coats?
Imagine each coat of paint settling like a calm lake after a gentle breeze—wait about 2 to 4 hours, depending on your paint’s consistency and room conditions. This drying time guarantees a smooth, even finish. If you notice a matte or slightly tacky surface, give it more time. Rushing can cause streaks or uneven coverage, so patience pays off for that flawless, drench-in-a-shade look.
Can Color Drenching Work in Rooms With High Humidity?
Color drenching can work in rooms with high humidity if you choose moisture-resistant paints designed for such conditions. These paints help tackle humidity challenges by preventing mold and peeling, ensuring your paint job lasts longer. Make sure surfaces are thoroughly dry before painting, and consider using a dehumidifier during the process. Proper preparation and selecting the right paint make color drenching effective even in humid environments.
What Tools Are Optimal for Achieving a Seamless Finish?
To achieve a seamless finish, choose the right tools like high-quality brushes and rollers. Use a brush for edges and detailed areas to guarantee precision, and opt for a roller with the appropriate nap for smooth or textured surfaces. Employ consistent roller techniques, like overlapping strokes and maintaining even pressure, to avoid streaks or lines. This combination helps create a flawless, uniform look across your walls, trim, and ceiling.

Scotch Felt Pads 32 PCS Beige, Felt Furniture Pads for Protecting Hardwood Floors, 1" Round, Easy-to-apply, Self-Stick design, Reliable protection from nicks, dents and scratches (SP802-NA)
- Suitable for various furniture: Protects furniture and décor
- Easy to install: Self-stick design for quick application
- Smooth movement: Felt material allows easy furniture relocation
As an affiliate, we earn on qualifying purchases.
Conclusion
So, why settle for boring walls when you can drench your space in one bold shade? Color drenching isn’t just a trend—it’s a daring act of interior rebellion. Embrace the chaos, skip the fuss of mismatched hues, and turn your home into a monochrome masterpiece. After all, who needs variety when you can have walls that scream “I know what I’m doing”? Go ahead, drown your space in one stunning color—your walls will thank you.
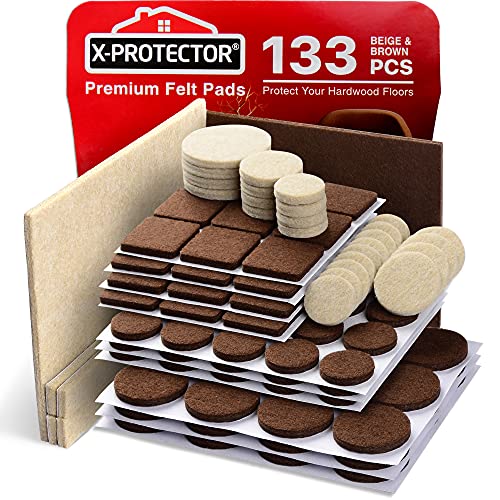
Felt Furniture Pads X-PROTECTOR 133 PCS Premium Furniture Pads - Felt Pads
- Floor protection for various surfaces: Protects wood, laminate, and tile floors
- Includes 2-pack for complete coverage: One brown and one beige pack, 133 pieces
- Multiple sizes for versatile fit: Various sizes to fit all furniture
As an affiliate, we earn on qualifying purchases.

240 Pack Felt Pads for Furniture, 0.75 Inch Self Adhesive Cabinet Cushion Dots, Mini Foam Felt Pads, Self Stick Furniture Protectors for Cabinet Doors, Desks, Drawers and Floors, Dark Brown
- Pack Size: 240 dark brown felt pads
- Pad Dimensions: 0.75 inch diameter
- Protection Area: Furniture and floors
As an affiliate, we earn on qualifying purchases.